Many a times same codebase(service) needs to run in multiple ways – as a service, as a bunch of cron jobs and more.
One job might need to run every 5 minutes. Another might need to run once a day. There may be a need to run the service on multiple architectures like AMD and ARM together. Some workloads may even need completely different scaling or configuration.
Traditionally, handling these differences often means creating separate pipelines or introducing additional deployment complexity.
But what if you could keep them under one service while giving each workload its own deployment strategy?
That’s the idea behind Multi-Deployment in BuildPiper.
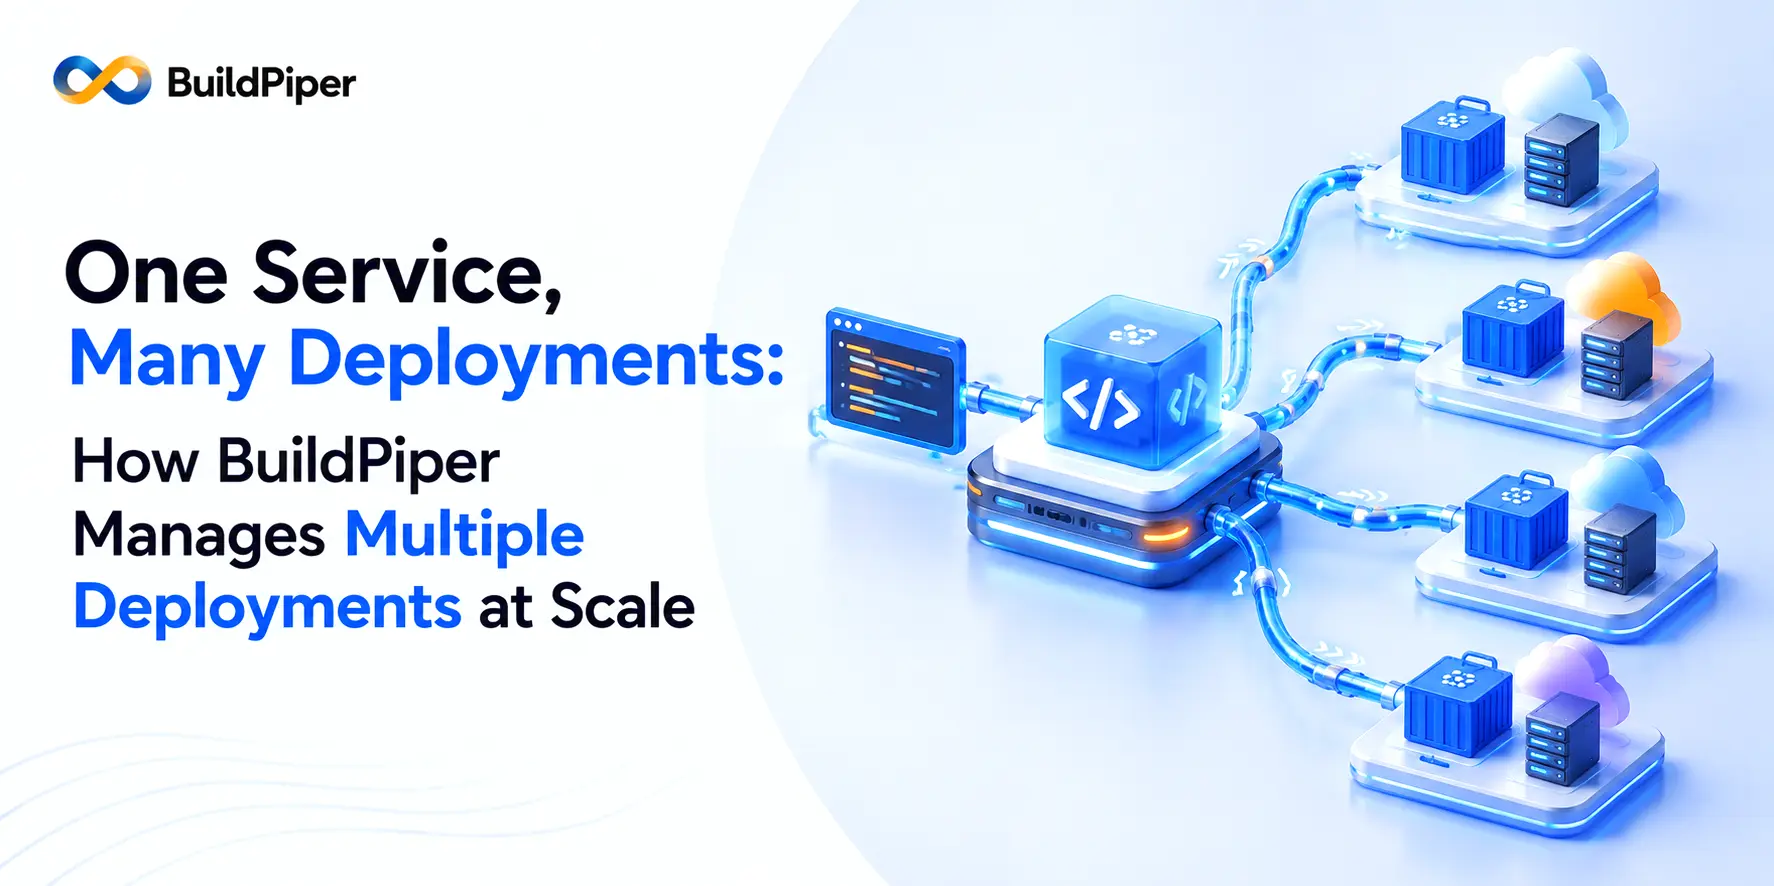
BuildPiper allows a single service to have multiple independent deployment, each with its own configuration and infrastructure requirements. This gives teams the flexibility to adapt deployment strategies as their services evolve- without unnecessarily splitting them into multiple services.
Why Would a Service Need Multiple Deployments?
A service ends up with multiple deployments when different configurations or workloads within it need to be managed independently – something a single deployment can’t do on its own.
Two common examples:
1. Different cron jobs, different schedules
A service might run as several cron jobs, each needing its own schedule and configuration. Rather than squeezing them into one deployment, each gets set up as its own deployment.
For example:
Job A runs every 5 minutes
Job B runs every hour
Job C runs once every night
Instead of forcing these workloads into a single deployment, each can be configured as an independent deployment with its own schedule and configuration.
This provides better control over scheduling, configuration, scaling, and lifecycle management. Further advantage is – the success/failure, metrices and data of every cron job can then be monitored and managed independently.
2. Multi-Architecture Deployment
Users can deploy multi-architecture images to optimize infrastructure costs by running their minimum required availability on AMD nodes, while using ARM nodes for horizontal scaling during increased demand, leveraging the lower cost of ARM-based infrastructure
How BuildPiper Tackles This Challenge
Which configuration path you use depends on whether the additional deployment lives in the same namespace as the existing one or a different one.
1. Multiple Namespaces → Setup Other Deployment
If deployments are configured across multiple namespaces, click “+ SETUP OTHER DEPLOYMENT” and add the required deployment details for that namespace.
- Open Deploy Details and click Setup Other Deployment. In the Service module, go to the ENV DEPLOY DETAILS tab for your service. Under the DEPLOY DETAILS sub-tab, click “+ SETUP OTHER DEPLOYMENT” in the top right corner.
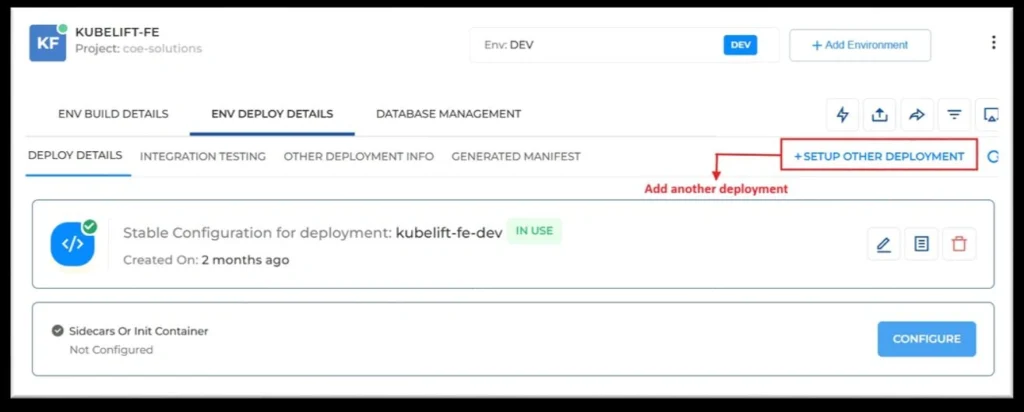
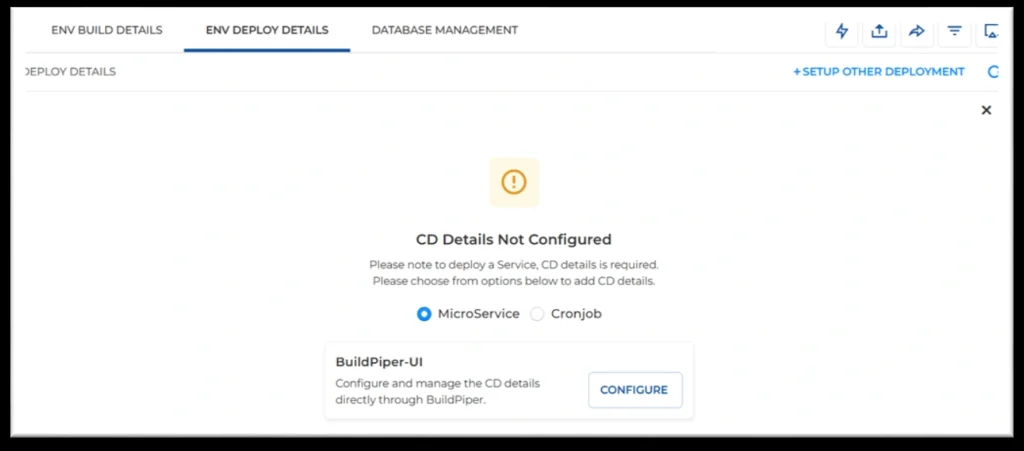
Setup Other Deployment button in ENV DEPLOY DETAILS - Choose the CD type. Since this is a fresh deployment, BuildPiper shows “CD Details Not Configured.” Select whether it’s a MicroService or a Cronjob (MicroService is selected by default), then click CONFIGURE under the BuildPiper-UI card.
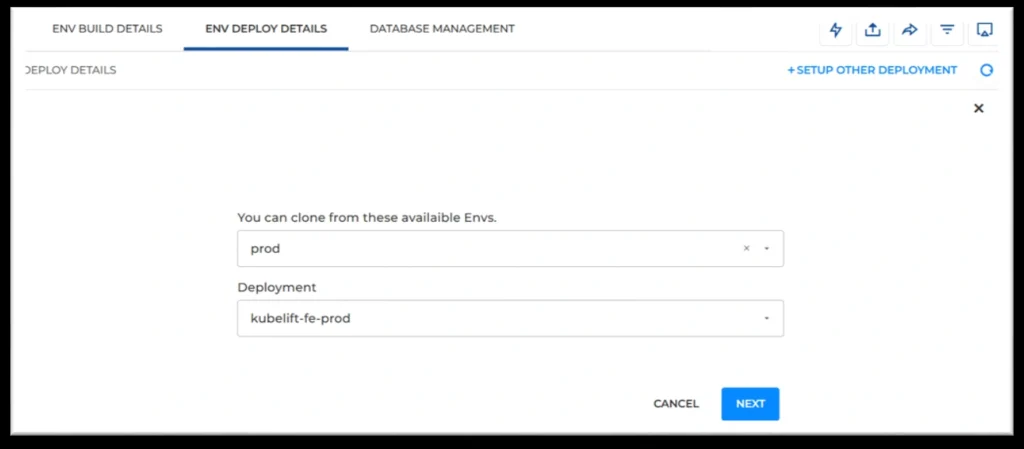
CD Details Not Configured screen with MicroService/Cronjob options - Clone from an existing environment, if useful. Optionally pick an environment to clone deployment settings from (e.g. prod) and the specific deployment to base the new one on (e.g. kubelift–fe-prod), so you’re not starting from a blank form. Click NEXT.
Clone deployment settings from an existing environment - Fill in the Deployment Details. Enter the service name (as in the service yaml), Deployment Name , Container Name, Desired Replica Count, Image Pull Policy and Namespace for this new deployment.
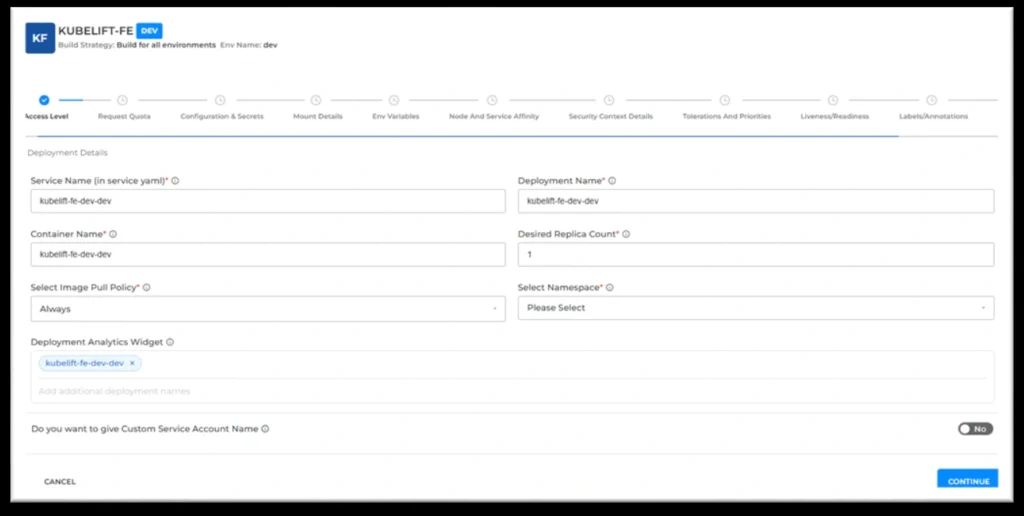
Deployment Details form on the Access Level step - Walk through the remaining configuration steps. Continue through the wizard’s stepper – Request Quota, Configuration & Secrets, Mount Details, Env Variables, Node and Service Affinity, Security Context Details, Tolerations and Priorities, Liveness/Readiness, Labels/Annotations, and any further steps – configuring each as needed.
- Save and verify.Once completed, the new deployment shows up alongside the original under ENV DEPLOY DETAILS, in its own namespace, ready to be managed independently.
2. Single Namespace → Add Deployment Names in Widget Data
If multiple deployments are configured within the same namespace, there’s no need for a separate setup flow – you simply add those deployment names in the Widget Data section of the deployment’s Manifest Information.
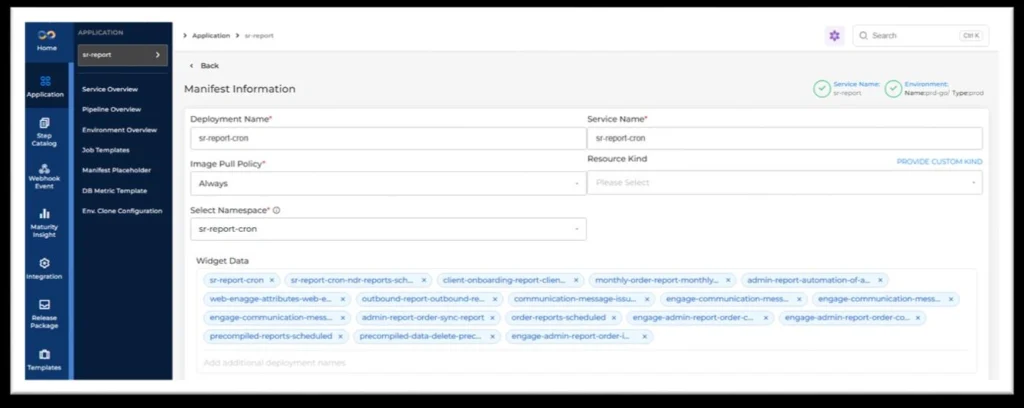
For example, the sr-report application’s sr-report-cron deployment (namespace prd-go) lists a whole set of related deployment names under Widget Data – sr-report-cron–ndr-reports-sch…, monthly-order-report-monthly…, admin-report-automation-of-a… precompiled-reports-scheduled and several more. Each entry represents another deployment tracked and managed together, all living in the same namespace.
Switching Between a Service’s Deployments
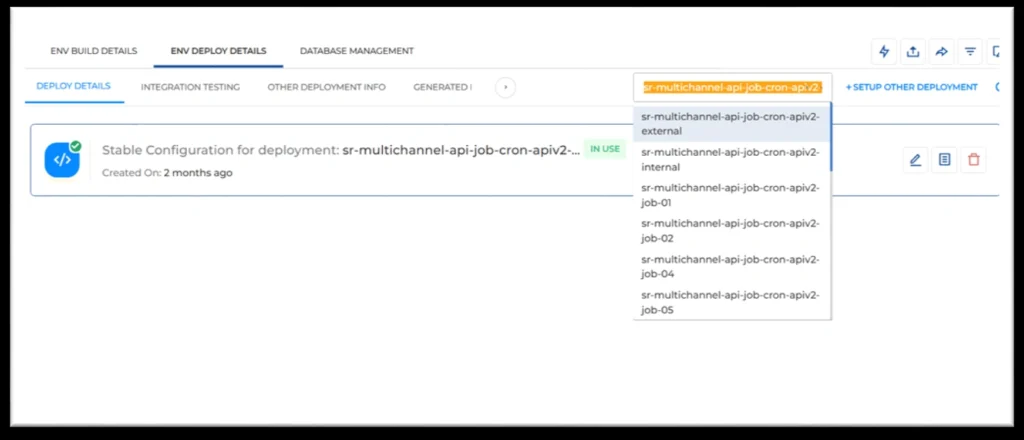
Once a service has multiple deployments configured, you can switch between them from a dropdown right next to DEPLOY DETAILS – no need to leave the page.
For instance, sr-multichannel-api-job-cron-apiv2 has separate deployments for external, internal, job-01, job-02, job-04 and job-05 – a natural fit for the “different cron jobs need different schedules” case described above, with each job as its own deployment.
Advantages
- Modularity. Each deployment stands on its own — a different cron schedule, a different compute target, a different architecture — so a service isn’t forced into one rigid configuration that tries to do everything at once.
- Zero repetition build. New deployments don’t start from a blank form. Cloning from an existing environment or deployment carries proven settings forward, so you’re not re-entering the same configuration every time.
- All status significance. Every deployment’s status is tracked and visible in its own right – nothing is hidden inside a single deployment’s health check. Whether it’s the cron job, the Graviton instance, or the ARM scaling group, each one’s state is meaningful and monitored on its own.
- Single push deployment. Once configured, deployments – whether linked across namespaces or listed together in Widget Data – can be pushed out together, instead of triggering each one by hand.
- Independent management. Each deployment can be updated, scaled, or rolled back on its own, without affecting the others, even though they all belong to the same application.
Conclusion
Applications rarely grow in a straight line – different pieces need different schedules, different compute, sometimes different architectures altogether. BuildPiper’s multi-deployment support meets that reality head-on: Setup Other Deployment for workloads that need their own namespace, Widget Data for those that can share one, and a single view where every deployment stays visible and easy to manage. The result is a platform that scales the way real applications actually do – one deployment at a time, without ever losing sight of the whole. application view.
Related Searches
- How to Set up CI/CD Pipeline
- Stop Building Script Bridges: Why Your CI/CD Pipeline Should Native-Clone Multiple Repos
- How to Build Multiple Images from One CI/CD Trigger Using Secondary Builds
- Top DevSecOps Consulting Companies in India 2026